How to Add Icons to Your Content
View Icon Reference // Go to the How-To section
Using icons can enhance your content and help your readers to understand what type of content you are trying to communicate.
In the past icons were often added as small images. These images were problematic in several ways:
- Image based icons tend to be difficult to layout on the page with odd spacing issues.
- Image based icons don’t look that sharp when displayed on high pixel density screens like phones, tablets or high-end computers.
- Image based icons are a set size — you can’t change the size to make them bigger or smaller
- Image based icons are a set colour — black.
Icon Fonts
You can now add icons to your content using an Icon Font. You may have used something similar in your Word documents using a font like “Windings”. These Wingding icons act like text and can change size and colour and look good printed at any size.
Icon Fonts on the web act in a very similar way. The icons are displayed on your content using a font stored on the web server.
…here’s the catch
In order to add icons to your page, you will need to do a little bit of simple HTML coding that follows a very simple pattern. We will walk you through this!
Adding an Icon
Overview of the steps
- Add some placeholder text where you would like to have your icon to appear on the page — I like to use “ZZZ”
- Switch to the Source mode in the WYSIWYG editor (fig 1)
- Locate your placeholder text and replace it with the simple icon code (snippet 1)
- Switch back to the WYSIWYG view in the WYSIWYG editor
- Repeat steps for each icon you wish to add
» View additional options for icons
Details of the steps
When you are adding content to your web page, you are most likely using the WYSIWYG editor — this editor allows you simply add content and change the style of the content. Behind the scenes, the WYSIWYG editor is writing your content out in a language called HTML. This is the language that the computer will understand when it looks at your web page.
(1) When you are ready to add your icon add some placeholder text where you would like to have your icon to appear on the page — I like to use “ZZZ” — this will help you find the location in the source easier.
(2) On the top-left corner of the WYSIWYG editor is a button labeled “Source”. Clicking on this button will switch the WYSIWYG editor to a mode where you can see the source code (the HTML) of the page that you are building. You will need to add the icon code using this mode.
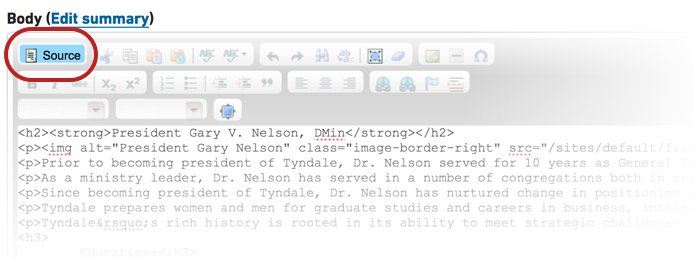
(fig 1)
(3) The code you will see in the Source mode may look confusing if you are not familiar with HTML, but don’t worry about that — just look for the placeholder text you added earlier.
Now you can replace the placeholder text with this simple bit of HTML code that will print out the icon on your page. There is an example you can copy and paste below — you will need to replace the “ic-heart” with the actual icon name you would like to use — you can view the icon reference on Tyndale.ca
<i class="ic ic-heart"></i>(snippet 1)
(4) You can now switch back to the WYSIWYG editor by clicking on the “Source” button again — you should now see your icon where the placeholder text was.
(5) You can have multiple icons on your page — just repeat the above steps!
You Have Options
When you add a basic icon your page, the icon will adopt the same colour as the text that it is next too. The icon will also adopt the size of the text beside it. This is especially noticeable when icons are added to headings. The size and colour of your icons can be changed by adding some simple code to your icon code — here’s how you do it…
» Changing the size of your icons
You can increase icon sizes relative to their container by adding one of the following classes defined below:
ic-lg ic-2x ic-3x ic-4x ic-5x
<i class="ic ic-search ic-lg"></i> ic-lg
<i class="ic ic-search ic-2x"></i> ic-2x
<i class="ic ic-search ic-3x"></i> ic-3x
<i class="ic ic-search ic-4x"></i> ic-4x
<i class="ic ic-search ic-5x"></i> ic-5x
(snippet 2)
» Changing the colour of your icon
The icon will automatically be the same colour as the text it is beside. You can change the colour of the icon by adding one of the following classes defined below: (displayed at 2x)
<i class="ic ic-star blue"></i>
<i class="ic ic-star red"></i>
<i class="ic ic-star gold"></i>
<i class="ic ic-star green"></i>
<i class="ic ic-star light"></i>
<i class="ic ic-star dark"></i>
(snippet 3)