Create an Event
Posting an event on the Tyndale website is a great way to promote it. Use this content type to provide information about an upcoming Tyndale event for external or internal audiences. Once an ‘Event’ content type is published, it is placed in multiple areas on the Tyndale website such as the Tyndale News & Events section, the Events calendar, and the Events listing.
Please Note: events will display on the various event lists until the day of the event. Events will be available on the Events Calendar for a period of 30 days after the event is completed, after which, they will be deleted.
To create a new Event:
Go to tyndale.ca/user and log in. You’ll be directed to your My Workbench page. Click the “create content” tab at the top of the page. On the “Create content” page, click the “Event” link. This will take you to the edit form to create a new event.
Or, any time you’re logged in, you can use the “Add content” link in the menu bar at the top of the page, and click the “Event” link in the dropdown menu.
Event content type fields
Title: the name of your event
Site Section: you will have been assigned one or more site sections when your user account was created. Select the relevant section.
Note: All of the details about your event are organized in a set of horizontal tabs. You can complete the form fields in one tab and then move to the next tab. The tabs with a red asterisks (*) include form fields that are required. Please check that each of the required fields are complete before saving your event.
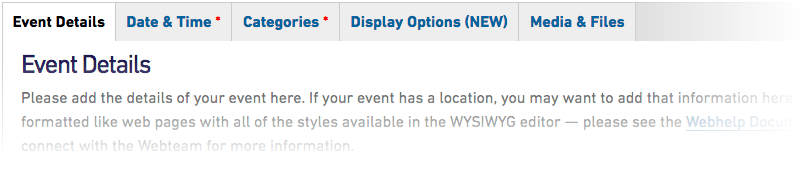
Event Details
Here you’ll add information about your event — text, images, links, and files. For help with adding and formatting content in the Details field, see the How-To documents and Best Practices documentation.
Don’t forget the event location, registration instructions, contact information, and any other important details.
Your event may have associated PDF brochures or posters that you want people to download. You may upload these files under the “Media & Files” tab (see below), but please also make sure that the main event details are included in the event description — just attaching a file is not sufficient.
Date & Time
In the first Date and Time fields, enter the beginning date and time of your event. In the second set, you can add an end date and time; if there’s no defined end time, you can click the “Show end date” checkbox to remove it. Clicking the Date fields brings up a pop-up calendar to navigate to the date.
Categories
Choose the event category that best fit your event. The event category is used to group events in different lists. For example, a list of all Campus Visit Events can be crafted from all events in the Campus Visit category.
If you are unsure what category to put your event in, please choose “General”. If you think that there needs to be additional categories created, please contact Andy Smith in the Marketing office.
Display Options
The options in this tab group allow you to select where your event will be displayed in specific locations across the site.
Events of interest to Alumni (new)
If your Event of interest to the Tyndale Alumni, please let us know! Events that are open to the Alumni will appear in an events list in the Alumni section of the website. This should be used for larger conferences and events, but not used for ongoing events such as Chapels.
Display Event on Home Page(s)
On each main homepage (tyndale.ca, tyndale.ca/seminary, and tyndale.ca/university), there is a list upcoming events. This field allows you to select specifically which of these list(s) you’d like your event to be displayed in.
Display Event in Segment List(s)
There are three page lists of events: the main list at tyndale.ca/events; a list of Seminary-specific events at /seminary/events; and a University College-specific list at /university/events. This field allows you to select which of these lists your event will show up in (the main list is selected by default).
School (URL base)
If your event is associated with a specific school (Seminary or UC), you can choose that option in this dropdown list and it will be added to the event’s URL.
Normally, an event URL follows this pattern: tyndale.ca/events/[my-event-title]. If you select “University College”, the URL will be tyndale.ca/university/events/[my-event-title]. Choosing “Seminary” will make it tyndale.ca/seminary/events/[my-event-title].
If you don’t select anything, the URL will follow the normal pattern.
Note that if you choose one of these options, you should also choose the same option in the “Include in Segment List” field.
Media & Files
Here you can add videos, files, and images.
Top Banner Image
This is an optional image that will display across the top of the page, just below the menu. It must be exactly 940 pixels wide and between 200 and 300 pixels high. You may create this image if you’re able; if you need help, contact the webteam.
Don’t forget to add good alternative text to your banner.
Embed Video Above/Below Event Details
These fields allow you to insert a video that will display between the event title and details, or below the details. Clicking the “Browse” button brings up a media browser window where you can insert the URL of a video from Vimeo or YouTube.
File upload
This field is used to upload files, such as PDFs or images, and link to them in the Details field. See how to upload and link to files and How to insert and style images. When linking to a file, don’t forget to add the filetype to the link text, e.g. My Document (PDF) so users know what to expect when they click the link.
Workflow: Draft and Ready for Review
The default state of new content is Draft, and it is not published on the website. When you are ready to publish, select “Ready for Review” and save the content. This will send it to the webteam for approval. You can also access the Workflow options without editing the content by following the “Workflow” tab link at the top of the page (when you are logged in).